
Nowadays, most of us use Sat Navs to travel around on our motorcycles. Personally, I use a BMW Navigator VI manufactured by Garmin, but others may use the popular Tom Tom. Last week, going through Facebook, an interesting question appeared – “Does anyone know if or how you can export a route on basecamp onto google maps?”, which led me to write this article. Almost all our Sat Navs support the “GPX” file format so it has become really easy to share routes with other people. However, how does one share a route with someone who does not own a Sat Nav? When I create a route, I like to be able to share it my friends or even here on our blog. Hence, this post will explain how to share our precious routes over the internet with anyone; following exactly the same steps that I have used to make our routes available in the “Routes” section of our blog.
For this tutorial, I am going to use a route I have downloaded from Ride Magazine. They have some fantastic routes which are available for free download via their website here. I have used “Day One” of “THE RIDE TOUR OF THE VOSGES AND THE DOUBS”, as I am planning to do this trip myself. If you want to follow the steps of the tutorial with the same route you can find it here.
The first step we will do is import the route into BaseCamp, this is the easy bit. First, I always create a “New List Folder” so everything remains tidy. Now, click in “File” and then “Import Into FolderName“.
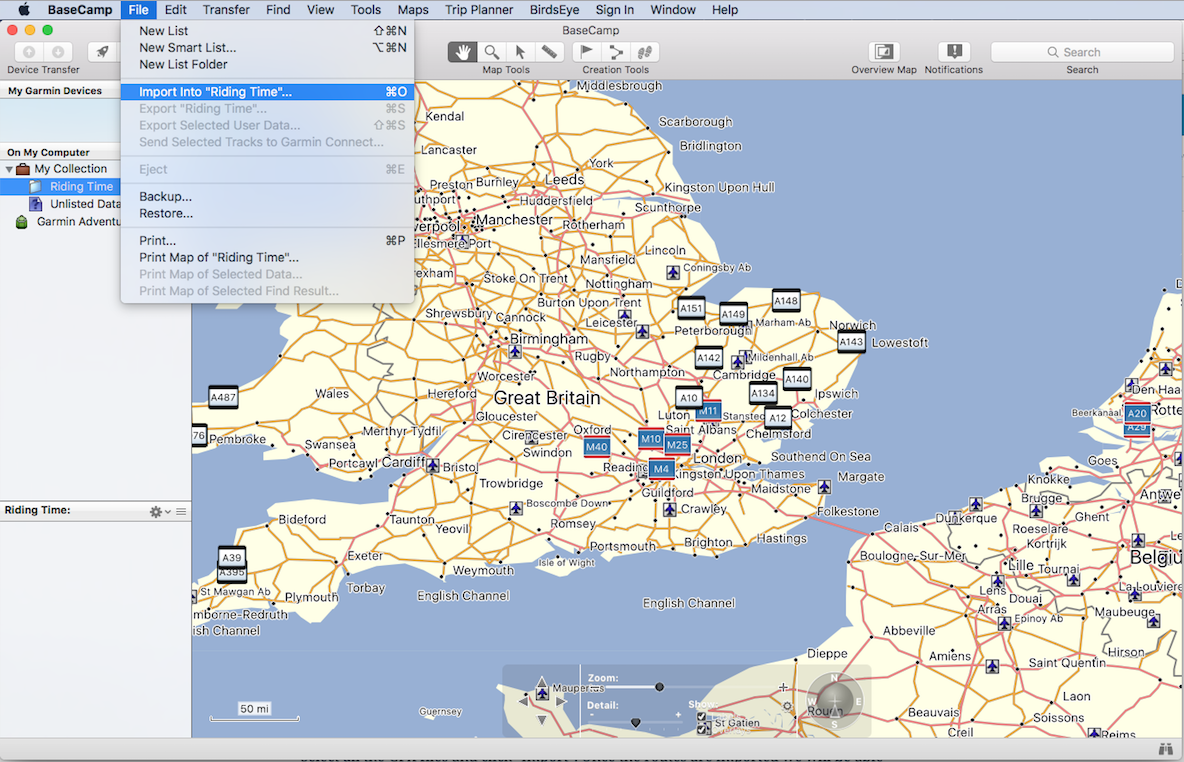
Select all the “GPX” files and click “Import”. Once the routes are imported we will be able to see them in different lists in our folder.
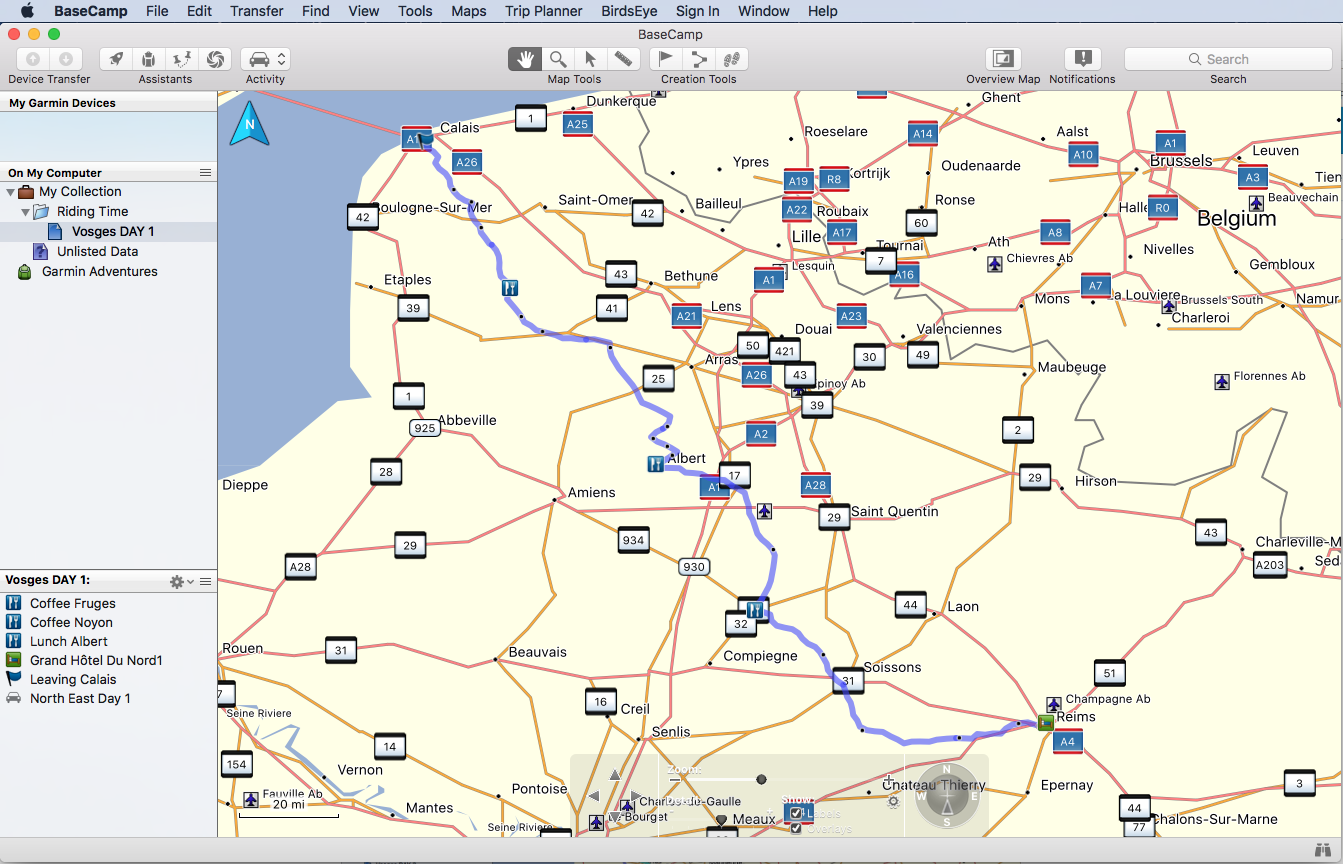
Now, right click on the list folder and click on “View Contents in Google Earth…”. Needless to say, you will need Google Earth installed in your computer, you can download the latest version here.
 Google Earth will create a new “place” called BaseCamp in the “Temporary Places” folder. Within this folder you will see the structure in the image. At this point you can choose if you want all the data within the “BaseCamp” folder (Waypoints, Via Points and Paths) or just the actual Route (Paths). Right click on the folder with the content you want to export (for this tutorial, I have exported the whole BaseCamp folder) and click on “Save Place As…”. When saving, make sure you are using “KMZ” as the file type, this is the best format to import the data into Google Maps. With this format the configuration of the layers remains and the Map will be much clearer once it has been imported into Google Maps.
 Now, we are ready to import the data into Google Maps. I always recommend you create a new Map, you can do this here (you will need to create a Google account if you don’t have one).
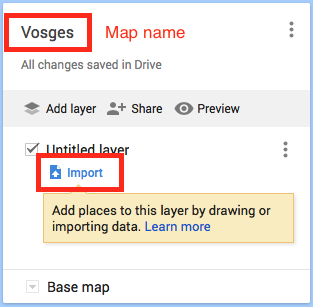
Once in the new map, you can rename it so you can easily identify it later, I have named my “Vosges”. To get the data in the map, click “Import” and select the “KMZ” file in your computer. This will import all the data, maintaining the various different layers; one for the waypoints, another for the via points and one for the actual route.
Finally, it is sharing time! You can choose between different options depending on who you will be sharing it with. I always use “On – Public on the web”, this way people can find the map when they search in Google and there are no restrictions.
You can find the route I created following this tutorial here.
I hope this Tutorial is useful! If you have any questions please contact us through the contact form.


Quality thanks for sharing
LikeLiked by 1 person
Thanks for your comment Peter. Please let us know if there are any other “How To…” you would like to see.
LikeLike
very useful. many thanks.
LikeLike